ProgDVB
ProgDVB is a free alternative for SkyStar cards (both v1 and v2) and a couple of other DVB-S cards. ProgDVB isn't as polished as commercial tools like DVBViewer, but it does everything for free, even AC3 audio.
Basic setup
ProgDVB need's marfi's SkyAVC filter. Download and copy the .ax file to c:\windows\system32, then start a command prompt (start - run - enter "cmd", and press OK) and type "regsvr32 skyavc.ax" (without the " s).
In case you want Teletext and or EPG (EPG is the electronic program guide that lists all programs on a channel and allows for timed recording), download the appropriate plugin from the ProgDVB homepage, copy the .dll file to the ProgDVB directory and restart ProgDVB. The plugins are then accessible via the Plugins menu.
Channel search
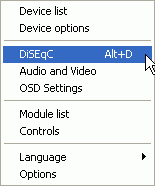
The first thing to do it set up the DiSEqC options. To do so, press Alt-D or select Settings - DiSEqC.

You'll get to the following screen:
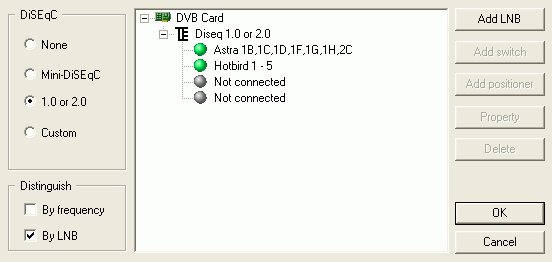 If
you have no DiSEqC switch, select None. In case you have a dual output DiSEqC
switch, select Mini-DiSEqC and in case your DiSEqC switch has 4 outputs (for
4 separate DVB receivers), select 1.0 or 2.0.
In case you have a DiSEqC switch, select one of the gray dots entitled Not connected, and press Add LNB.
If you have no DiSEqC switch, select the single green dot with no description, then select Property.
In the next screen, select the appropriate Satellite from the dropdown list,
then press OK.
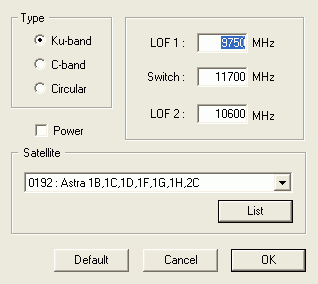 Normally
you shouldn't have to modify Type, LOF 1 / 2 and Switch settings, but in case
you already have a working DVB setup (I guess you'll have a standalone receiver
somewhere, make sure the settings match).
Repeat this procedure for every connected satellite, then press OK to
get back to the main window.
Now you can search all the channels on the satellites you have set up. Select Channel list - Channel search - and then the appropriate satellite to start the search.

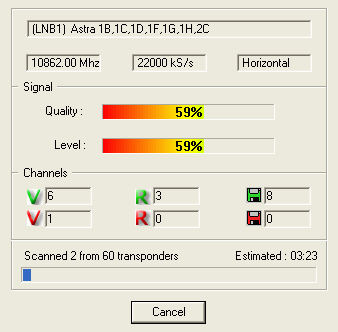
Once the search is done, you'll find a new tab in the channel list (that's the left part of the window), where all the found channels are listed. All channels that have a green V symbol before them are free-to-air channels, channels with a red V symbols are encrypted video broadcasts. The colors also work for radio stations (they have an R symbol) and data channels (those have a floppy disc symbol).
The entire list might be a bit overwhelming so you might want of filter the list before going on. To do that, select Channel list - Settings.
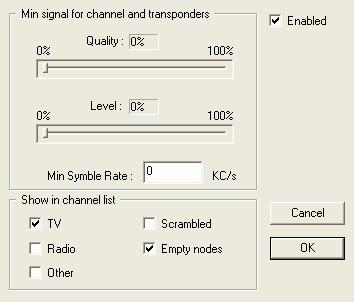 Check
Enabled to enable the filter.
The Min signal for channel and transponders can be used to filter out channels that you have problem receiving (breaking up, or not getting any signal at all). In case you leave both values at 0%, those options remain inactive.
The Show in channel list options are most interesting. Here you can filter out radio and data channels as well as encrypted channels that you can't receive. Just deselect all the types of channels you don't want, then press OK.
Recording
Now you're pretty much set to go, but before you do, let's configure the output by selecting Service - Record Options.
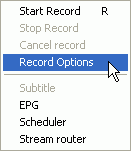
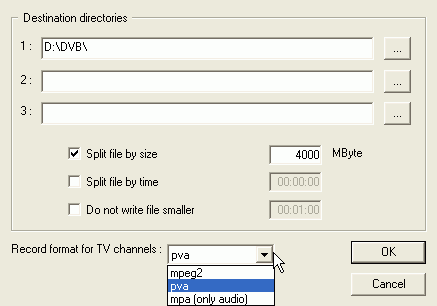 There
are 3 destination directories, but I have no idea what number two and three
are for. Just set an appropriate directory in the first line and you're all
set.
In case you have a FAT32 disc, also select Split file by size and enter 4000 MByte or you might run into problems during recording.
Then set the Record format for TV channels to pva and press OK to get back to the main window.
Now you can record by pressing R, and stop recording by pressing Service
- Stop Record.
And how about AC3 audio? First of all you need a TV station that broadcasts in AC3. Most stations do not, and those that do also broadcast in MP2, which is the audio track that is taken by default in ProgDVB. To change this, right click on the appropriate channel, then select Channel property.
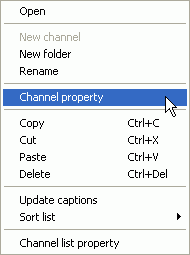
The window that now appears is a bit confusing and contains a lot of information that you do not have to care about.
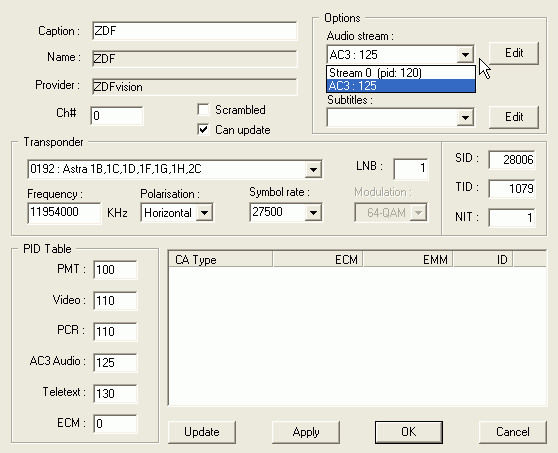 The
only thing that matters is the Audio stream in the Options.
In case a station is broadcasting multiple streams, you'll find an active dropdown menu there. Then select the appropriate channel, and press OK to save the changes.