TMPG Procedures
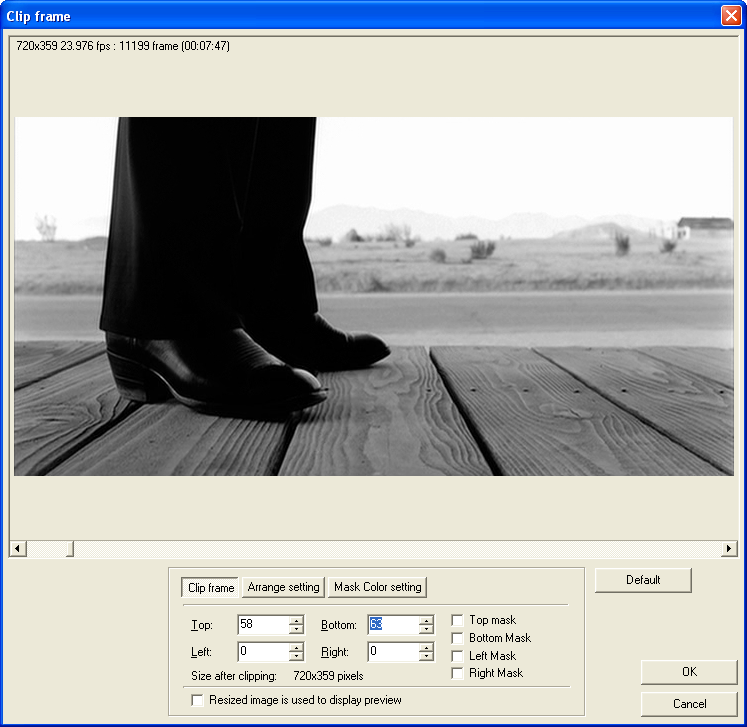
Load your video source into TMPG. Then click on Setting and go to the Advanced tab. There, double click on Clip frame.

Notice that now the aspect ratio is okay. It should be pretty obvious how to crop... simply increase Top and Bottom until there's no black bars anymore. Then press OK.
>> BACK
You can adjust the audio offset by selecting Source range, the first of the checkable options in the Advanced tab of the Settings, right above Inverse telecine. Double click on it to configure:

Audio gap correct is the value you have to change. You can of course also use negative values.
>> BACK
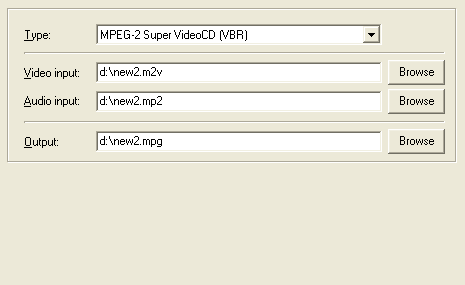
Start the MPEG Tool by pressing File - MPEG Tools. Then go the Simple Multiplex
tab. chose the right Type: MPEG-1 Video CD for VCDs and MPEG-2 Super Video CD
(VBR) for SVCDs.
 Then
load the input files and define an output file. If the files are called mpv
and mpa simply rename them to m2v (or m1v in case of an MPEG 1 video) and mp2.
Then press Start.
Then
load the input files and define an output file. If the files are called mpv
and mpa simply rename them to m2v (or m1v in case of an MPEG 1 video) and mp2.
Then press Start.
It has come to my attention that in some cases the multiplexing will result in a disc that's unplayable in a standalone. In that case you should use bbMPEG to multiplex.
>> Read more about
bbMPEG
>> BACK
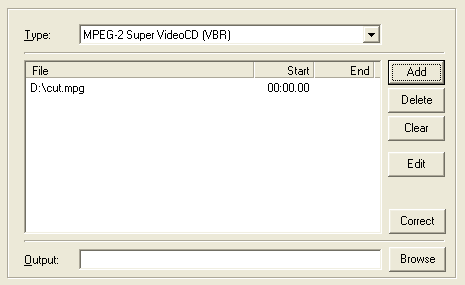
Start MPEG tools by pressing File - MPEG Tools. Then go to the Merge & Cut tab.
 Set
Type to MPEG-2 Super VideoCD for SVCD or MPEG-1 VideoCD
for VCD and load your file by pressing Add and then selecting it. After that
set an output name, click on the file once and press Edit
Of course there are other tools capable of cutting an mpeg2 file: M2-Edit or Mpeg2Vcr. To cut MPEG1 files you can also take VCD Cutter, M1 Edit or MyFlix but especially VCD Cutter has the nasty habit to fail quite often or to create really choppy files.
One thing: If TMPG seems to hang start the task manager and check the program's status.. usually it looks like it were hanging but it's still processing the files.
 It
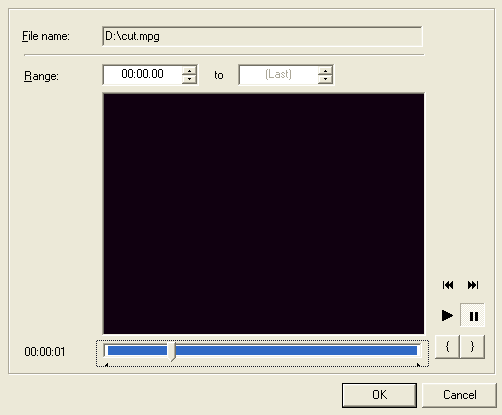
should be pretty obvious how to use the cutter but here we go anyway. Press
{ to set the position from which you want to cut and } to mark the end position.
You can also manually enter values, just respect the format: minutes:seconds.tenths
of seconds. But the playing position will be shown on the left so that should
be okay. Of course you can start playing the movie and just press the IN and
OUT buttons whenever you feel like. After you've set your range press OK
and OK again in the actual MPEG Tools window. After it's done to close
the MPEG Tools you have to press Cancel, quite unusual but that's how it works.
>> BACK
A very annoying "feature" of TMPEGEnc is that the files it produces cannot be multiplexed correctly, so we have to demultiplex it. Switch to the Basic Demultiplex tab in TMPGEnc (File-->Mpeg Tools). Open your MPEG2 file, and click Start to demultiplex it.
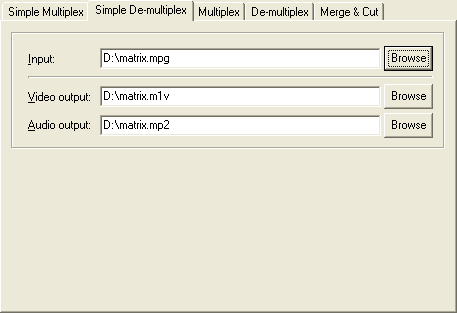 Once done, your MPEG
file should be splitted to a video file and a audio file.
>> BACK
Load the d2v project file (if it hasn't been loaded yet), then go to the advanced properties (settings - advanced).
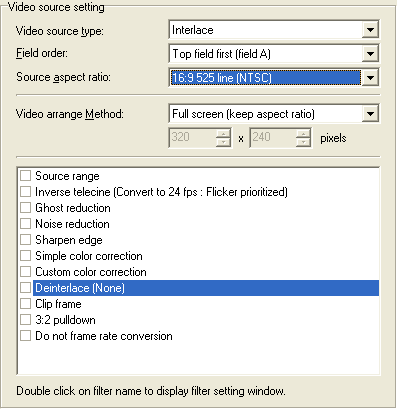 Now
set the Field order to Top field first, and then double click
on Deinterlace (Inverse Telecine may not be active for this to work).
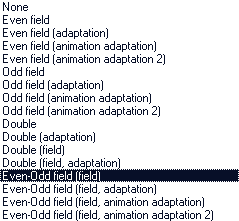
Then choose Even-Odd field (field) from the list and use the navigational buttons below the movie window to play the movie (it won't be real-time but that doesn't matter). If you should notice that the movie goes on for a few frames, then appears to jump back for a frame or two, goes on a bit again, then jumps back again you have the wrong field order, so go back and change it, then go to the deinterlace configuration again and play it again and you'll see that the movement is now smooth.
When you're done disable the deinterlacing again.
>> BACK
Thanks to Inwards for this rather easy and time saving method which works quite well for most Hollywood movies. Animes are another thing again.. the level of rff changes in such movies is quite extraterrestrial ;) But let's get down to business.
The most common rff sequence seems to be 01001. When you are in the IVTC window right click and click Deal after this frame according to selected pattern.
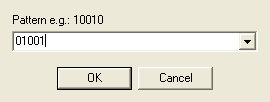 Enter
01001 here and press OK. The whole movie will now be IVTCed as if the movie
had a constant rff sequence. Now press the right arrow to move forward until
you get to a point where it starts to get interlaced again. Then try to use
a delayed version of our pattern. For instance instead of having 01001 at some
point make it 001001 and then repeat the well known pattern again. Having 0101
is also a possible solution. Usually by only delaying / advancing our pattern
by one frame all our problems are solved again (at least for some time). You
can check if your selected pattern is valid by pressing the Check button at
any time.
Here are a few examples: Many Dreamworks movies have a couple of seconds of black at the beginning before we see the DreamWorks logo. The frames before the logo are interlaced, the rest is progressive. In American Beauty you can fix the interlacing you get by using the same pattern for the whole movie by applying or pattern, then unselect frame 25b, and have TMPG start applying the same pattern again at the same frame. This will get us the 01001->001001 situation. We have the reverse situation when doing Gladiator: There you have to apply a regular pattern up to frame 80b, then apply the pattern again to frame 81a and following.
This neat trick has just saved us hours of encoding. Instead of having TMPG process the whole movie and eventually still screw up we can fix the few situations where the sequence actually changes and have perfect results in much less time than if we tried to find a new sequence manually. Inwards has assured me that this method has worked for him in any hollywood movie he encoded so far.
>> BACK